

Everything works during development. Signups confirm, magic links arrive, password resets land in seconds. Then you launch, twenty people sign up in an hour, and the emails stop.
Nothing is broken. Both Supabase and Firebase ship a built-in email service intended for development, and both rate limit it aggressively. The messages also come from their domain rather than yours, so the ones that do send often land in spam.
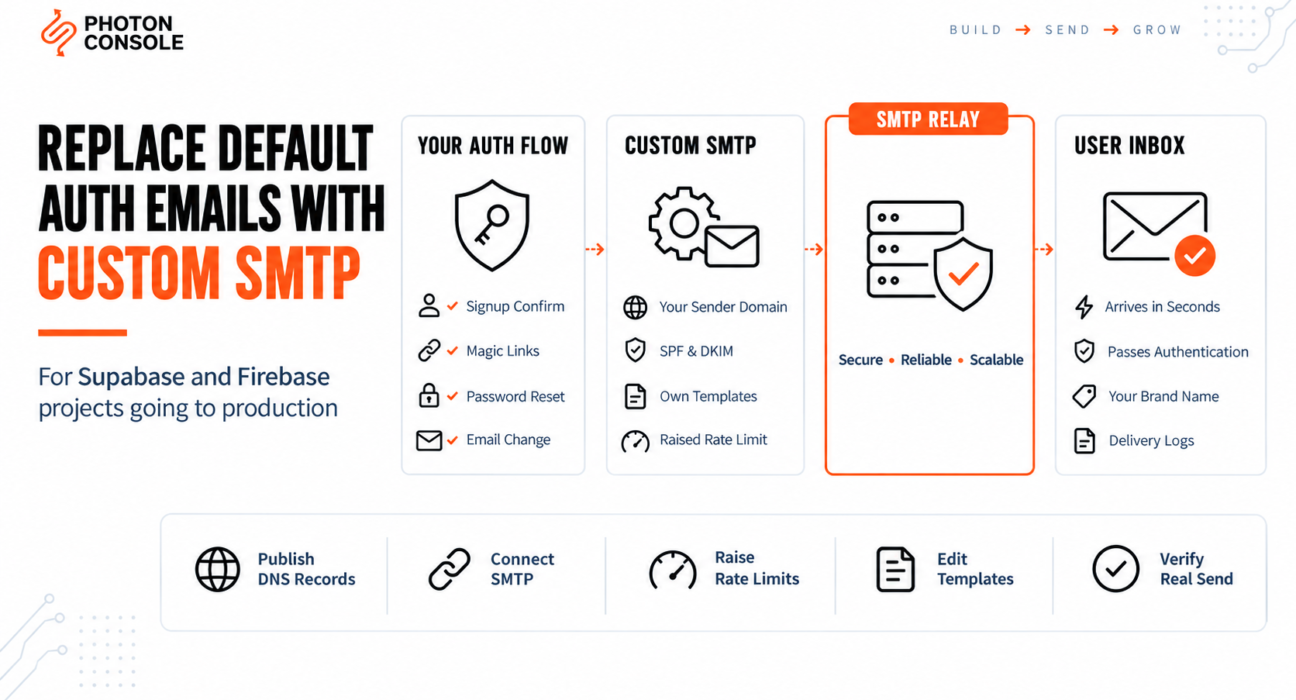
This guide covers moving auth emails onto your own SMTP relay: why the defaults cap out, how to configure custom SMTP in each platform, how to take control of the templates, and how to confirm delivery actually improved.
Quick Answer: How Do You Set Up Custom SMTP?
Supabase: open Project Settings, then Authentication, then SMTP Settings. Enable custom SMTP and enter:

Sender email:  noreply@yourdomain.com
Sender name:   Your App
Host:          smtp.photonrelay.com
Port:          587
Username:      your_project_api_user
Password:      your_secret_api_key
Firebase: open Authentication, then Templates, then the SMTP settings section, and enter the same connection details.
Both platforms then send through your relay instead of theirs. The step most teams miss comes next: publishing SPF and DKIM records so your sending domain is authorised. Without those, custom SMTP changes who sends the mail but not whether receiving servers trust it. An authenticated relay such as PhotonConsole supplies both the credentials and the DNS records.
Why the Built-In Email Services Cap Out
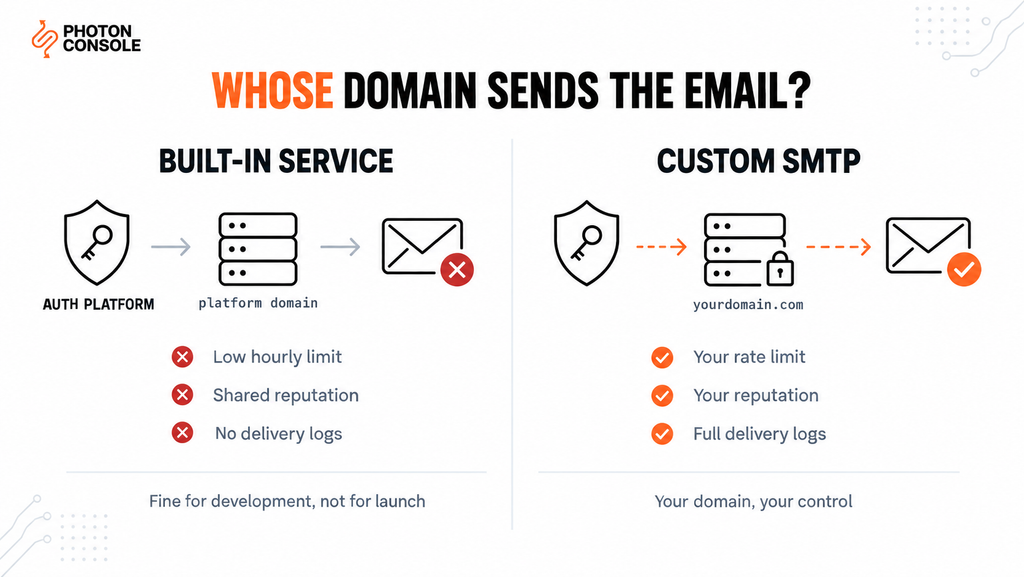
Supabase and Firebase both provide email out of the box so you can build an auth flow without configuring anything. Neither intends that service for production traffic.
Supabase’s documentation is explicit that the built-in service is for testing and development, with a low hourly limit, and recommends custom SMTP before going live. Firebase sends from a project subdomain you do not control, which limits what you can do about deliverability.
| Aspect | Built-in service | Custom SMTP |
|---|---|---|
| Hourly send limit | Low, intended for testing | Set by your relay plan |
| Sender domain | The platform’s domain | Your own domain |
| SPF and DKIM alignment | Not aligned with your domain | Aligned once DNS is published |
| Delivery logs | Not available to you | Available in the relay dashboard |
| Bounce handling | Not exposed | Webhooks available |
| Suitable for production | No | Yes |
Rate limits on both platforms change over time, so check the current figures in their documentation rather than relying on a number quoted in any article, including this one.
Why Auth Emails Fail After Launch
1. The Hourly Limit Is Reached
A launch, a marketing push, or a batch of test signups can exhaust the built-in allowance quickly. Once the limit is hit, further emails are simply not sent. Your application reports a successful signup because the user record was created — the email was a separate step that silently failed.
2. Messages Come From a Domain You Do Not Own
Receiving servers check whether the sending domain authorised the message. When mail arrives from a platform subdomain while claiming to represent your product, there is no alignment with your domain, and filters respond accordingly. This matters more than it used to under Google’s sender guidelines.
3. Shared Sending Reputation
The default service is shared by many projects on the platform. Poor sending behaviour by other projects affects the reputation of the IPs your mail leaves from, and you have no visibility or control over it.
4. Time-Critical Mail Arrives Late
Magic links and one-time codes expire. A message delayed by rate limiting or filtering is worthless by the time it arrives, and the user simply cannot sign in.
5. Custom SMTP Configured Without DNS Records
This is the most common half-finished migration. The relay is connected, mail sends successfully, and it still lands in spam — because the sending domain publishes no SPF or DKIM records. Our guide to SPF, DKIM and DMARC explains the records, and the free email deliverability checker shows what your domain currently publishes.
Common Mistake
Connecting custom SMTP and stopping there. The sender address changes to your domain, which is exactly what receiving servers will now check — and if that domain has no SPF or DKIM records, alignment fails in a way it did not before. Deliverability can get worse rather than better. Publish the DNS records in the same session you connect the relay, never as a follow-up task.
Setting Up Custom SMTP in Supabase
Step 1: Publish DNS Records First
TXT    @                    v=spf1 include:relay.photonconsole.com ~all
CNAME  photon._domainkey    dkim.photonconsole.com
Note
DNS changes are not instant. SPF and DKIM records can take from a few minutes to 24-48 hours to propagate depending on your registrar and TTL settings. Also check you do not already publish a second SPF record — two separate TXT records starting with v=spf1 break authentication entirely.
Step 2: Enter the SMTP Settings
In the Supabase dashboard, open Project Settings, then Authentication, then SMTP Settings. Enable custom SMTP and supply the sender address, host, port and credentials shown in the quick answer.
The sender address must be on the domain you authenticated in step one. Using a Gmail or Outlook address here defeats the purpose, because that domain has not authorised your relay to send on its behalf.
Step 3: Raise the Auth Rate Limit
Connecting custom SMTP does not automatically lift Supabase’s own auth email rate limit. That is a separate setting under Authentication, then Rate Limits. Teams frequently connect a relay, test successfully, then hit the same wall at launch because this step was missed.
Step 4: Customise the Templates
Under Authentication, then Email Templates, Supabase exposes each auth email — confirm signup, invite, magic link, change email address, reset password and reauthentication.
Three things are worth changing from the defaults:
- Subject lines. Generic defaults look like phishing. Name your product.
- Sender name. Users judge legitimacy in the inbox list before opening anything.
- Body content. Include what the email is for and what to do if the user did not request it.
Quick Fix
Supabase Signup Emails Not Arriving
- Confirm custom SMTP is enabled, not just filled in and left unsaved
- Check the sender address is on a domain with SPF and DKIM published
- Raise the auth rate limit under Authentication, Rate Limits
- Check the minimum interval between emails is not throttling repeat requests
- Try port 2525 if 587 appears to be blocked
Setting Up Custom SMTP in Firebase
Step 1: Publish the Same DNS Records
Identical to Supabase. The records authorise your relay to send as your domain, regardless of which platform triggers the message.
Step 2: Configure SMTP in the Console
Open Authentication, then Templates. The SMTP settings section accepts the same host, port, username and password, along with the sender address and name.
Step 3: Set the Action URL to Your Domain
By default, Firebase verification and reset links point at a Firebase-hosted domain. Users clicking a link to a domain they do not recognise is a trust problem, particularly for security-related mail.
Change the action URL to a path on your own domain, and add that domain to the authorised domains list so the link continues to work.
Step 4: Customise Each Template
Firebase exposes templates for email verification, password reset, email address change and SMS. Edit the sender name, subject and body for each, in the same way as Supabase.
Quick Fix
Firebase Verification Emails Landing in Spam
- Confirm the sender address uses your domain, not the default project subdomain
- Publish SPF and DKIM for that domain and verify propagation
- Change the action URL to your own domain so the link matches the sender
- Avoid link shorteners in templates — they resemble phishing patterns
- Score a real verification email with a deliverability testing tool
Port Reference
| Port | Encryption | When to use |
|---|---|---|
| 587 | STARTTLS | Recommended default for both platforms |
| 465 | Implicit SSL | When the platform requires SSL |
| 2525 | STARTTLS | When 587 appears blocked |
| 25 | None | Avoid — blocked almost everywhere |
Configuring Both Platforms With PhotonConsole
The same credentials work for Supabase, Firebase, or both at once.
Host:          smtp.photonrelay.com
Port:          587          (465 for SSL, 2525 if 587 is blocked)
Username:      your_project_api_user
Password:      your_secret_api_key
Sender email:  noreply@yourdomain.com
Sender name:   Your App
Because auth emails are time critical, delivery speed matters more here than for most mail. A magic link that arrives after the token expires is a failed signup, not a late email. Every PhotonConsole account includes 5,000 free emails per month, which covers a small product’s auth traffic indefinitely and lets a larger one validate the full setup — DNS, templates and rate limits — before any spend. Details are on the PhotonRelay page, and pricing has no monthly minimum.
If you are comparing options first, our analysis of free SMTP servers covers where each stops being practical.
Verifying the Migration Worked
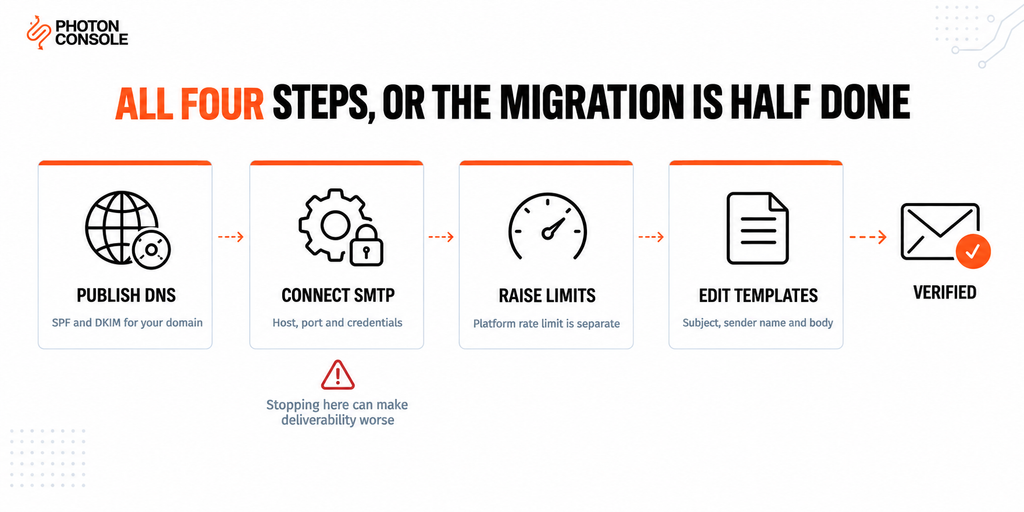
Connecting SMTP successfully is not proof that delivery improved. Check three things before considering the job done.
Authentication passes. Trigger a real signup to an address you control and inspect the received message. SPF and DKIM should both show as passing. Mail Tester scores a real send and reports both, and MXToolbox confirms your DNS records resolve as intended.
The sender is what users expect. The inbox list should show your product name and your domain, not a platform subdomain.
Delivery is fast enough. Time a password reset from request to inbox. Anything beyond a few seconds is worth investigating, because auth mail competes with an expiring token.
Platform Notes
Local Development
Keep using the built-in service locally, or a mail catcher such as Mailpit. There is no benefit to burning relay volume on test signups, and test sends to invented addresses generate bounces that harm your reputation.
Multiple Environments
Use separate credentials for staging and production so a misconfigured staging environment cannot affect production sending reputation. Separate credentials can also be revoked independently.
Self-Hosted Supabase
Self-hosted instances have no built-in email service at all, so SMTP configuration is required from the start rather than being an upgrade.
Firebase Extensions
The Trigger Email extension sends application mail from Firestore documents and is configured separately from auth templates. Point it at the same relay so all mail from your product shares one sending identity.
Pro Tips
- Use a subdomain for auth mail. Sending from
mail.yourdomain.comkeeps auth reputation separate from your business email. - Set a monitored reply address. Users reply to security emails. A noreply address that bounces looks untrustworthy.
- Never use a personal Gmail as the relay. Google’s caps are low, automated traffic gets throttled, and account suspension takes your entire auth flow down.
- Test every template, not just signup. Password reset and email change are frequently left on defaults and only discovered when a user complains.
- Keep the token expiry realistic. Very short expiry windows turn ordinary delivery latency into failed logins.
- Re-verify DNS after registrar changes. Moving DNS providers commonly drops TXT records without anyone noticing.
Related Issues You May Hit Next
- SMTP authentication errors when credentials are rejected
- Emails landing in Gmail spam despite a successful send
- Emails arriving late when delivery is slow rather than failing
- Emails sent but not delivered when the server reports success
- SMTP configuration reference for host, port and encryption settings
Frequently Asked Questions
Do I have to set up custom SMTP for Supabase?
For production, yes. Supabase’s own documentation describes the built-in service as being for testing and development, with a low hourly limit that a real launch will exceed.
Why do auth emails land in spam even with custom SMTP?
Almost always missing SPF or DKIM records on the sending domain. Once you send from your own domain, receiving servers check that domain’s records — and if there are none, alignment fails.
Can I use Gmail as the SMTP provider?
For local testing only. Google enforces low daily caps, throttles automated traffic, and can suspend the account, which takes password resets and signups down with it.
Does custom SMTP remove Supabase’s rate limit?
Not automatically. The auth email rate limit is a separate setting under Authentication, Rate Limits, and needs raising independently.
Can I use the same relay for Supabase and Firebase?
Yes. Both accept standard SMTP credentials, and using one relay for both keeps your sending identity and reputation consistent.
Why do Firebase links point at a Firebase domain?
That is the default action URL. Change it to a path on your own domain and add that domain to the authorised domains list, so the link matches the sender.
How fast should auth emails arrive?
Within a few seconds. Magic links and one-time codes expire, so delivery latency directly becomes login failure.
Conclusion
Supabase and Firebase both give you working auth email on day one, which is exactly what you want while building. Neither is built to carry a live product’s signup traffic, and both send from a domain you do not control.
Moving to custom SMTP is a short configuration change, but it has two halves. Connecting the relay changes who sends the mail. Publishing SPF and DKIM is what makes receiving servers trust it. Doing only the first can leave deliverability worse than before, because the domain being checked is now yours and it has nothing published.
Once both are done, auth email stops being a source of support tickets. A dedicated transactional email solution handles the authentication, routing and sending reputation, and works with both platforms from the same credentials. Developers building on other stacks may also want our guides to sending email in Node.js and sending email in Python.