You click “Send.” Nothing happens.
Or worse — the email appears to send, but never arrives. You check your code. It looks fine. You check the credentials. They match. You restart the server. Still nothing.
The problem is almost never the code. Most SMTP failures come from incorrect configuration — the wrong port, a missing authentication step, the wrong encryption setting, or a firewall rule that silently blocks outbound connections.
Getting SMTP configuration right is not complicated once you understand what each setting does and why it matters. This guide walks you through every required setting, explains the most common mistakes, and gives you a clear step-by-step process for configuring SMTP correctly — whether you are setting up a web application, a WordPress site, or connecting a business tool to an email server.
Quick Answer: What Does SMTP Configuration Include?
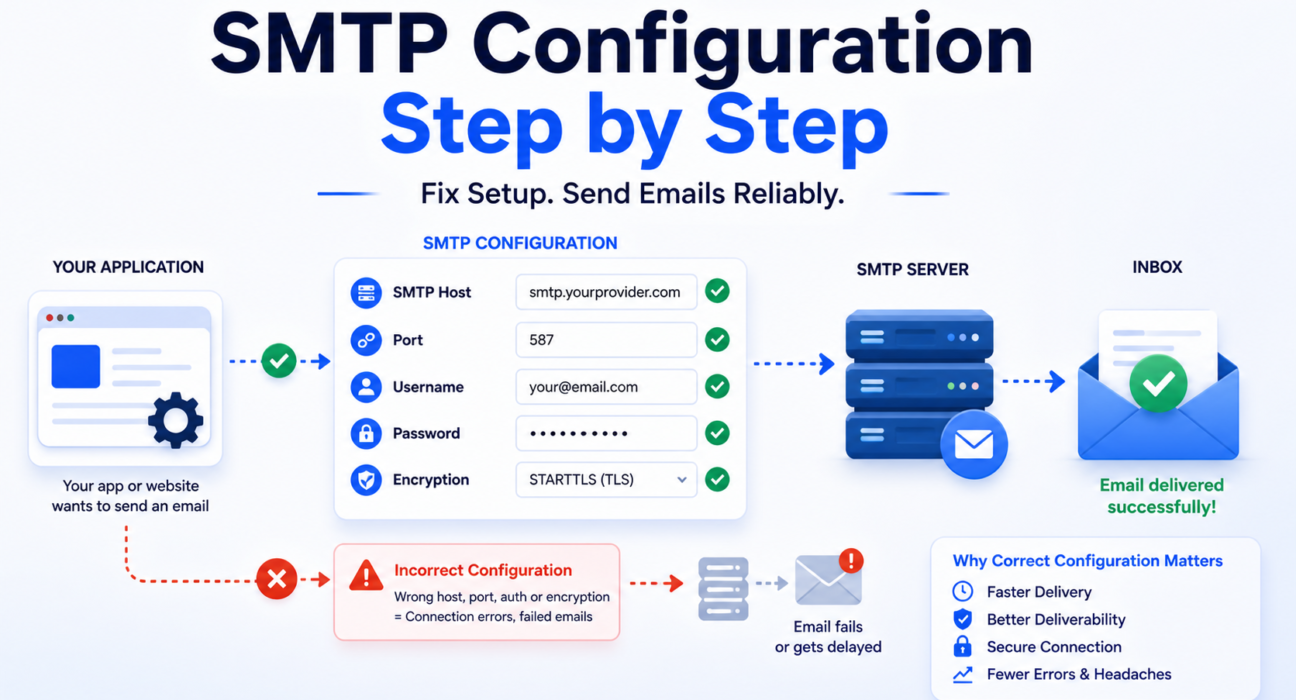
SMTP configuration is the set of settings that tells your application how to connect to an email server and send messages on your behalf. Every SMTP setup — regardless of platform or provider — requires four core pieces of information:
| Setting | What It Is | Example |
|---|---|---|
| SMTP Host | The address of the mail server your application connects to | smtp.photonconsole.com |
| Port | The communication channel used to reach the server | 587 (most common), 465, 25 |
| Authentication | Your username and password to prove you are an authorized sender | your@email.com + app password |
| Encryption | The security protocol that protects your email in transit | STARTTLS (port 587) or SSL/TLS (port 465) |
Get all four right and your email sends reliably. Get one wrong and you will see connection timeouts, authentication errors, or emails that send but never arrive. The sections below explain each setting in full and walk you through the correct setup process.
What Is SMTP Configuration?
SMTP stands for Simple Mail Transfer Protocol. It is the standard protocol that computers use to send email from one server to another. When you send an email from an application — whether it is a contact form, a password reset flow, or a notification system — your application does not deliver the email directly to the recipient’s inbox. It hands the message off to an SMTP server, which handles delivery.
SMTP configuration is the process of telling your application which server to use, how to authenticate itself, and how to establish a secure connection to that server.
In simple terms: Think of SMTP configuration as giving your application a mailing address, a key to the mailroom, and instructions on which door to use. Without all three, the letter never leaves the building.
Every email sending scenario — a WordPress plugin sending order confirmations, a Node.js app sending OTPs, a PHP form sending contact submissions — relies on SMTP configuration to function. The configuration itself does not change much between use cases. What changes is the provider you connect to and the specific values they assign to each setting.
The Four Required SMTP Settings Explained
Before you touch any configuration screen, you need to understand what each setting does. Entering values without understanding them is the most common path to errors that are difficult to diagnose.
1. SMTP Host
The SMTP host is the domain address of the mail server your application will connect to. Your email provider or SMTP relay service gives you this value when you create an account. It typically looks like:
smtp.gmail.com— for Google accountssmtp.office365.com— for Microsoft 365 accountssmtp.mailgun.org— for Mailgun relaysmtp.photonconsole.com— for PhotonConsole relay
Copy this value exactly as provided. A single typo — a missing character, a dot in the wrong place — will prevent the connection from establishing entirely. Never guess the host address.
2. SMTP Port
The port tells your application which communication channel to use when connecting to the SMTP server. There are three ports in common use, and choosing the wrong one is one of the most frequent SMTP configuration mistakes.
| Port | Encryption Type | Use Case | Status |
|---|---|---|---|
| 587 | STARTTLS (upgrades to TLS) | Application email, transactional sends | Recommended for most setups |
| 465 | SSL/TLS (implicit) | Secure sending where STARTTLS is not available | Acceptable alternative |
| 25 | None or optional | Server-to-server relay only | Blocked by most cloud providers and ISPs for application use |
Use port 587 in almost every case. It is the current standard for outbound application email, it supports STARTTLS encryption, and it is accepted by virtually all SMTP providers. If port 587 is blocked on your network, try port 465 with SSL. Never use port 25 for application-level sending — it is blocked by most cloud hosting providers and ISPs, and it does not provide encryption by default.
3. SMTP Authentication (Username and Password)
SMTP authentication proves to the mail server that your application is an authorized sender. Without it, the server will reject the connection. Most modern SMTP servers require authentication on every connection — unauthenticated relay is rarely permitted outside tightly controlled server environments.
Your username is typically your email address or an account identifier assigned by your SMTP provider. Your password may be your regular account password, or it may be an application-specific password generated separately from your main credentials. Providers like Google require app passwords for SMTP access when two-factor authentication is enabled on the account.
Never store SMTP credentials in plain text inside your application code. Use environment variables or a secrets manager to keep credentials out of your codebase and away from version control systems.
4. Encryption (TLS and SSL)
Encryption protects your email content and credentials while they travel from your application to the SMTP server. Without encryption, both the message content and your login credentials are transmitted as plain text — visible to anyone monitoring the network connection.
There are two encryption methods in common use:
- STARTTLS: Starts the connection unencrypted and then upgrades to TLS during the handshake. Used on port 587. This is the current standard.
- SSL/TLS (Implicit): Establishes an encrypted connection immediately from the start. Used on port 465. Slightly older standard but still widely supported.
Always enable encryption. A configuration without TLS or SSL will fail on most modern SMTP servers and will expose your credentials on any connection that does succeed. The MDN TLS reference provides a clear technical explanation of how the protocol works if you need to go deeper.
Required Settings Recap:
- Host — exact address from your provider, copied precisely
- Port — 587 with STARTTLS is the standard; 465 with SSL is the alternative
- Authentication — username and password or app-specific credentials
- Encryption — always enabled; STARTTLS on 587, SSL on 465
SMTP Configuration Step by Step
Follow these steps in order. Each one builds on the last — skipping steps or working out of sequence is the most common cause of configuration errors that take hours to diagnose.
Step 1: Choose Your SMTP Provider
Your SMTP provider is the service that actually delivers your email. This is the first decision — and it determines the values you will use for every other setting.
Your options fall into two categories:
- Your email account’s built-in SMTP server. Gmail, Outlook, and other providers include SMTP access. This works for low-volume or personal use, but carries sending limits and lacks delivery logging for production applications.
- A dedicated SMTP relay service. Services like PhotonConsole, Mailgun, or SendGrid provide dedicated relay infrastructure designed for application email. They offer higher sending limits, delivery logs, better inbox placement, and authentication support.
For any application that sends transactional email — password resets, order confirmations, OTPs — a dedicated relay is the right starting point. Built-in provider SMTP servers are not designed for application-level sending and will create reliability problems as your volume grows.
Once you have chosen a provider, log into your account and locate the SMTP credentials page. This is where you will find the host address, port options, and your authentication details. Keep this page open — you will need it for every following step.
Step 2: Gather Your SMTP Credentials
Before opening any configuration panel, collect all four required values from your provider:
- SMTP host address
- Recommended port (confirm whether they prefer 587 or 465)
- Your SMTP username
- Your SMTP password or API key
Write these down or keep them in a secure credential manager. Do not copy values from memory or informal sources — use only the official documentation or dashboard of your SMTP provider. Incorrect credentials are responsible for the majority of authentication failures on first-time setups.
If your provider uses API keys rather than a standard username/password pair, confirm exactly how the key maps to the username and password fields in your configuration. Some providers use “apikey” as the literal username with the key as the password. This is documented per-provider and must match exactly.
Step 3: Enter Settings in Your Application or Platform
Open the email or SMTP settings panel in your application. The location varies by platform:
- WordPress: Use the WP Mail SMTP plugin. Navigate to WP Mail SMTP > Settings > Email in your WordPress admin panel.
- Node.js with Nodemailer: Configure the
createTransport()function with your host, port, auth object, and secure flag. - PHP with PHPMailer: Set
$mail->Host,$mail->SMTPAuth,$mail->Username,$mail->Password,$mail->SMTPSecure, and$mail->Port. - Generic application settings: Look for an “Email,” “SMTP,” or “Outgoing Mail” section in your platform’s settings or administration panel.
Enter each value exactly as provided by your SMTP provider. Pay close attention to spacing — some configuration fields silently retain a trailing space that breaks the connection without producing a clear error message.
Step 4: Select Port and Enable Encryption
This step is where most first-time configurations fail. Port and encryption must be configured together — the wrong combination will produce a connection error even if everything else is correct.
Follow this logic:
- If your provider recommends port 587: select STARTTLS (or “TLS” in some interfaces). Do not enable SSL.
- If your provider recommends port 465: select SSL/TLS (or check the “Use SSL” box). Do not use STARTTLS.
- If your platform has a “Secure Connection” toggle separate from the port setting: enable it. Always.
If your platform shows a field labeled “Secure” as a boolean (true/false), set it to true for port 465 and false for port 587 when STARTTLS handles the upgrade automatically. This varies by library and platform — check your platform’s documentation if you are unsure.
Step 5: Configure the Sender Address
Most SMTP configurations require a “From” address — the email address that will appear as the sender in your outbound messages. This must be an address your SMTP provider has authorized you to send from. Sending from an unauthorized address will either fail at authentication or cause deliverability problems at the inbox provider level.
Best practices for the sender address:
- Use a real, monitored address rather than a no-reply alias wherever possible
- For transactional email, use a subdomain like
mail.yourdomain.comto isolate transactional sending reputation from your primary domain - Make sure the From domain matches the domain used in your SPF and DKIM records
SPF, DKIM, and DMARC authentication records are closely tied to your sender address. If the domain in your From address does not match your authentication records, your emails will face deliverability problems regardless of how correctly the SMTP connection itself is configured. The full setup process for these records is covered in our guide on SPF, DKIM, and DMARC explained.
Step 6: Test the Connection Before Going Live
Never assume the configuration is correct. Always test before sending real email to real users.
Most SMTP configuration panels include a “Send Test Email” button. Use it. Send a test to an address you control on a major inbox provider — Gmail or Outlook — and check three things:
- Did the email arrive? If not, there is a connection or authentication problem.
- Did it land in the inbox, not spam? If it went to spam, there is an authentication or reputation issue.
- Does the “From” address display correctly? If it shows an unexpected address, your sender configuration needs adjustment.
For a deeper test, send your test message to Mail Tester, which gives you a full score on authentication, content quality, and spam likelihood. A score below 8 out of 10 indicates a specific, fixable problem. Address any issues before pointing production traffic at the new configuration.
Step-by-Step SMTP Configuration at a Glance
- Choose your SMTP provider and log into your account
- Collect host address, port, username, and password from the provider dashboard
- Open the SMTP settings panel in your application or platform
- Enter host, port, username, and password exactly as provided
- Set encryption — STARTTLS for port 587, SSL for port 465
- Configure your authorized sender address
- Send a test email and verify inbox delivery and spam score
- Set up SPF, DKIM, and DMARC DNS records for your sending domain
Common SMTP Configuration Mistakes
These are the errors that appear most frequently in SMTP support tickets. Each one has a clear fix — but only if you know what to look for.
Using the Wrong Port
Choosing port 25 for application email is the single most common first-time mistake. Port 25 is reserved for server-to-server mail relay and is blocked by most cloud hosting providers, VPS environments, and ISPs for outbound application email. If you are sending from a web application or hosted service and using port 25, your connection will time out silently — no error message, no bounce, no diagnostic signal. Switch to port 587.
Similarly, mixing port and encryption type — using STARTTLS on port 465, or SSL on port 587 — will produce a handshake failure that many platforms report as a vague “connection refused” error. Match port 587 with STARTTLS and port 465 with SSL, always.
Incorrect or Expired Credentials
Authentication errors are among the most common causes of email delivery failures, and they almost always trace back to credentials that are wrong, outdated, or entered incorrectly. Common causes include:
- Using an account password instead of an app-specific password when two-factor authentication is enabled
- A trailing space copied into the password field from a document or email
- An API key used without knowing whether it maps to the username or password field
- Credentials that were regenerated by the provider after a security event, leaving the old values in the application configuration
When you see an authentication error, generate fresh credentials from your provider dashboard rather than retyping the existing ones. A fresh copy eliminates clipboard or formatting errors that are nearly impossible to spot visually. Our guide on SMTP authentication errors walks through the specific error codes and their causes in detail.
Firewall Blocking Outbound SMTP Ports
Many cloud hosting providers, corporate networks, and shared hosting environments block outbound connections on ports 25, 465, and 587 by default. This is a security measure designed to prevent servers from being used for spam. The block is invisible from your application’s perspective — the connection simply times out.
If your SMTP configuration looks correct but connections are failing, check whether the port is reachable from your server. On Linux, you can test this with:
telnet smtp.yourprovider.com 587If the connection hangs or refuses, the port is blocked at the network level. Contact your hosting provider to enable outbound connections on port 587, or use an SMTP relay that operates over HTTPS as a fallback.
Missing or Misconfigured DNS Authentication Records
SMTP configuration handles the connection. DNS authentication records handle the trust relationship with receiving mail servers. Many teams configure SMTP correctly but skip SPF, DKIM, and DMARC setup — and then wonder why their emails land in spam despite successful delivery logs.
Without SPF, receiving servers cannot verify that your SMTP provider is authorized to send on your domain’s behalf. Without DKIM, there is no cryptographic proof that messages were not altered in transit. Without DMARC, inbox providers have no policy to apply when authentication checks fail.
All three records are now mandatory for reliable inbox placement with Gmail, Outlook, and Yahoo. Missing any one of them will cost you deliverability on major inbox providers regardless of how clean your SMTP setup is.
Using a Shared IP With Poor Reputation
Your SMTP configuration may be technically correct, but if the sending IP associated with your provider is on a blacklist or has accumulated spam complaints from other tenants, your emails will face filtering or rejection regardless. This is a provider-level problem, not a configuration problem — but it is one that correct provider selection prevents.
Before relying on any SMTP provider for production email, check their IP ranges against major blacklists using MXToolbox Blacklist Check.
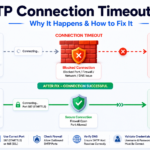
Ignoring Connection Timeout Errors
A connection timeout is not always a firewall issue. It can also indicate that the SMTP host address is incorrect, that the server is temporarily unavailable, or that the port combination is wrong. When you see a timeout, check all three before assuming the network is blocking the connection.
Key takeaway: Most SMTP errors point to one of five causes — wrong port, bad credentials, blocked firewall, missing DNS records, or a bad shared IP. Narrow it down systematically rather than changing multiple settings at once.
How to Test Your SMTP Configuration
Testing is not optional. An untested configuration is a configuration that will fail in production at the worst possible moment. Run these checks before directing real traffic through any new SMTP setup.
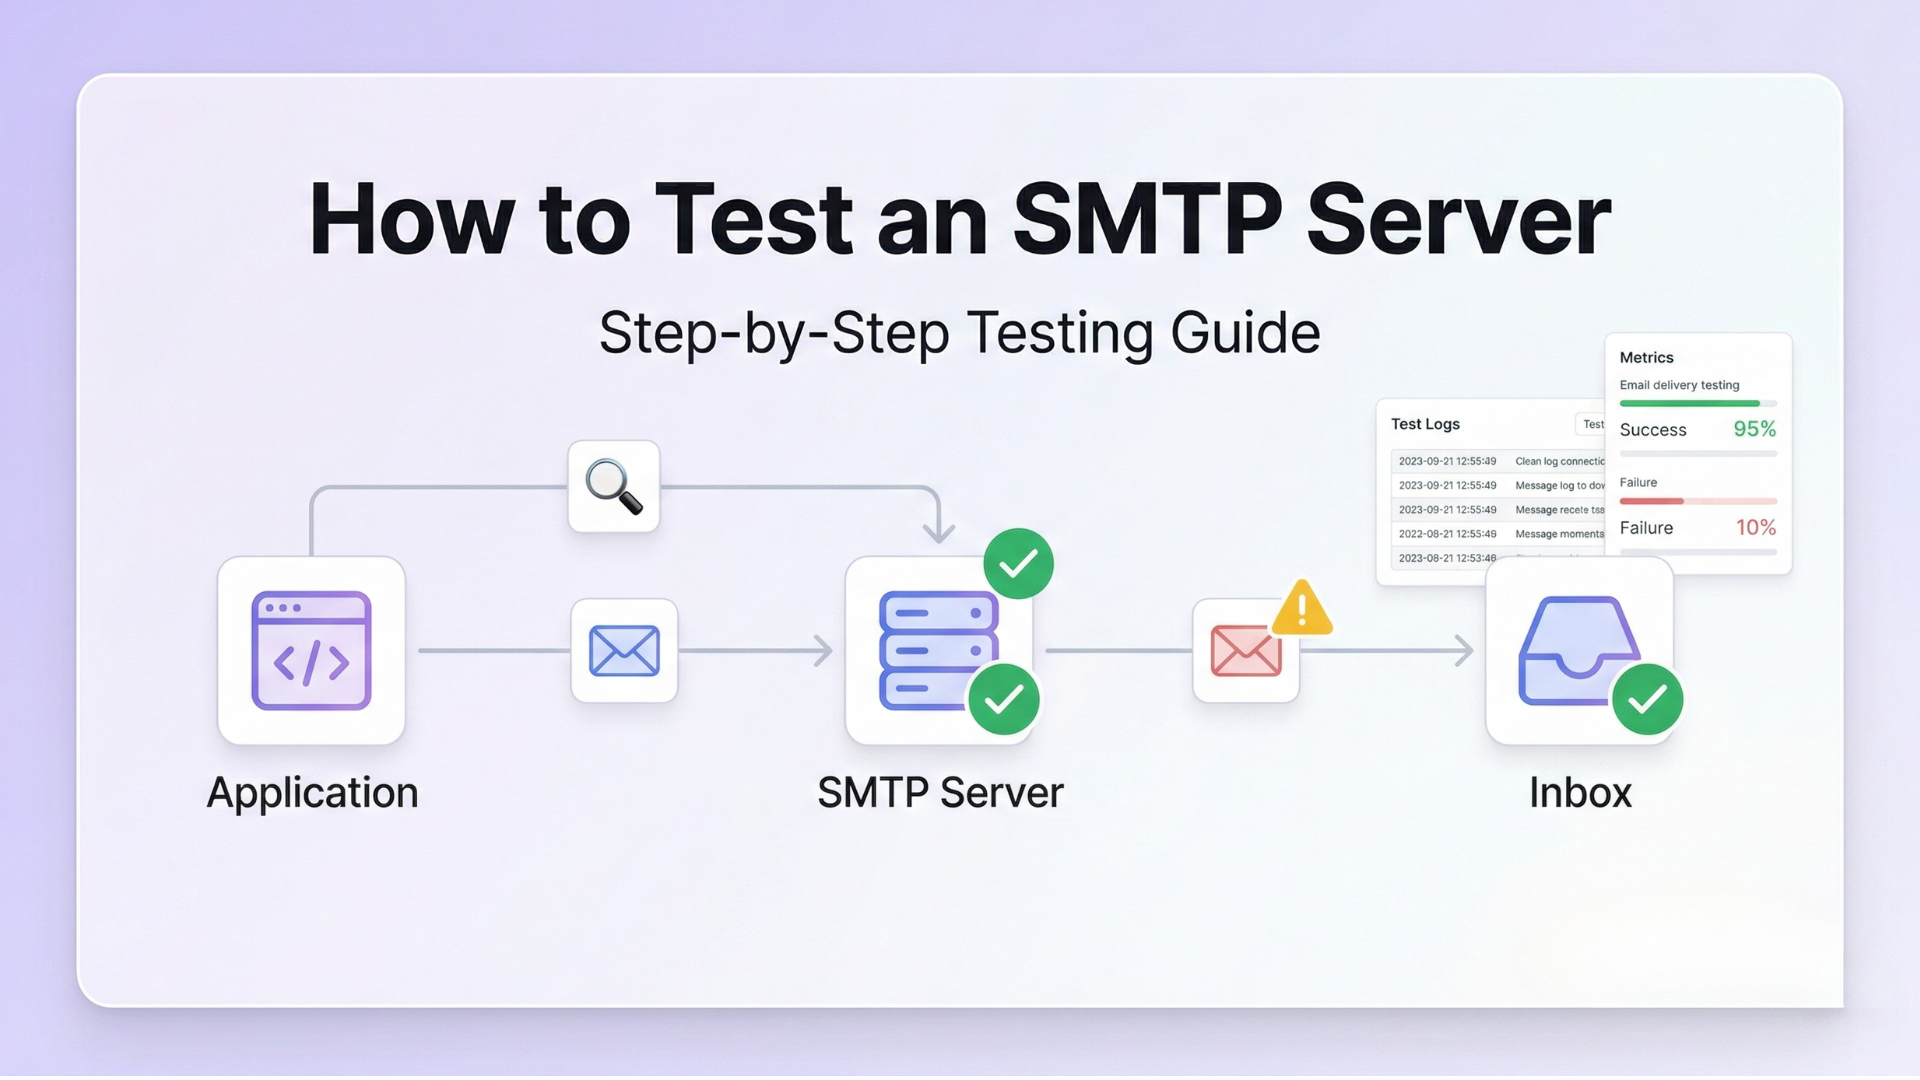
Use the Built-in Test Email Function
Most email plugins and application frameworks include a “Send Test Email” or “Test Connection” button in the SMTP settings interface. This is always your first test. It confirms that the basic connection — host, port, credentials, encryption — is working at a functional level.
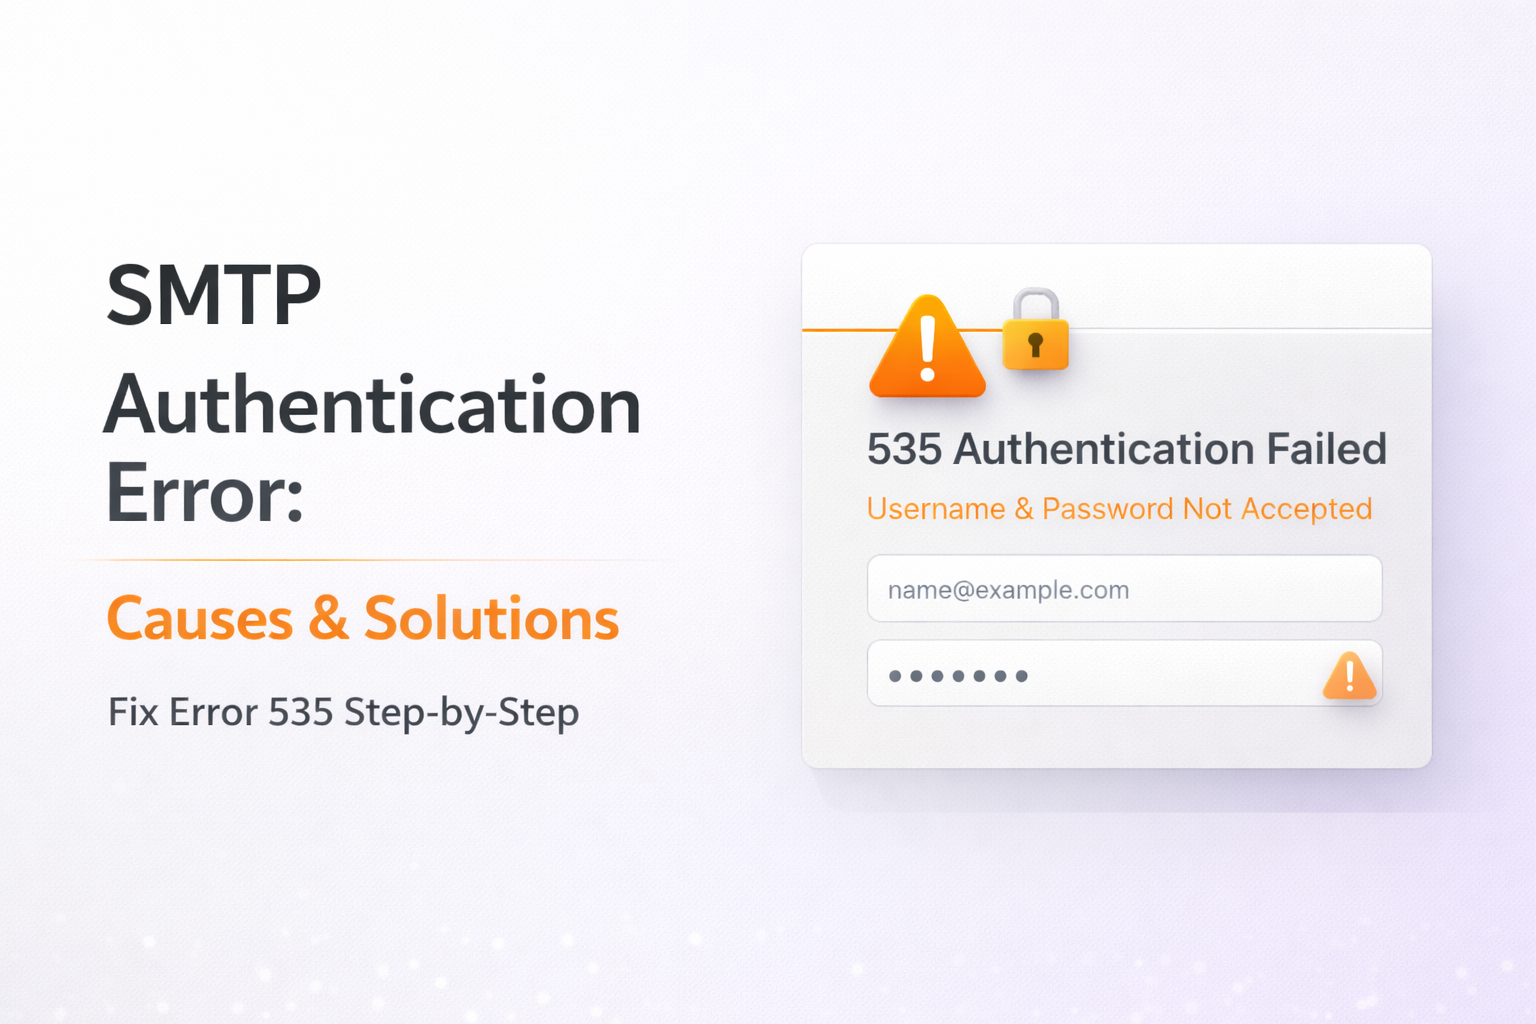
If the test email fails, your platform will usually return an error message. Cross-reference that error against the SMTP response code reference to identify the exact cause. Different codes point to different problems: 535 means authentication failed, 421 means the server is temporarily unavailable, 550 means the recipient address was rejected.
Score Your Configuration with Mail Tester
Once the connection test passes, send a message to Mail Tester. The service gives you a score out of 10 and breaks down every factor affecting your email’s deliverability: SPF alignment, DKIM signature validity, DMARC policy status, content quality, and blacklist status. A score of 9 or 10 indicates a configuration that will deliver reliably to major inbox providers.
Verify DNS Records with MXToolbox
Use MXToolbox to verify that your SPF, DKIM, and DMARC records are published correctly in DNS. The tool also checks your sending IP against major blacklists and identifies common DNS configuration errors. Run this check even if your test email delivered successfully — delivery to a test inbox does not guarantee correct DNS authentication, which affects your long-term deliverability.
Check Your Server Logs
For application-level SMTP configuration, your server logs are the most detailed diagnostic tool available. Enable verbose SMTP logging in your framework or library during testing to see the full SMTP dialogue — every command sent and every response received. This output tells you precisely where a connection fails: at the TLS handshake, at the authentication step, at the RCPT TO command, or at the DATA phase.
Reviewing the SMTP testing methods guide covers all of these diagnostic approaches in detail — including how to read log output and interpret common error patterns.
Test Across Multiple Inbox Providers
Send test emails to Gmail, Outlook, and Yahoo before going live. Each inbox provider applies different filtering algorithms and authentication checks. An email that delivers correctly to Gmail may still land in Outlook’s Junk folder if your IP reputation is poor with Microsoft’s filtering systems. Testing across providers reveals problems that single-provider testing misses.
How SMTP Configuration Affects Email Deliverability
Getting the connection working is only part of the job. The way you configure SMTP — specifically your authentication, sender address, and provider choice — has a direct and lasting impact on whether your emails reach the inbox.
Authentication Gaps Trigger Spam Filtering
As of 2026, Gmail, Outlook, and Yahoo all require full SPF, DKIM, and DMARC alignment from senders. A correctly configured SMTP connection without valid DNS authentication records will result in emails landing in spam — or being rejected entirely. The connection succeeds, but the delivery fails at the inbox level.
Senders with a properly enforced DMARC policy see inbox placement improvements of up to 2.7 times compared to unauthenticated senders. This is not a marginal difference. For transactional email — where every missed delivery is a failed user interaction — authentication is infrastructure, not an optional extra.
Wrong Port Selection Causes Silent Failures
Using port 25 in an environment where it is blocked does not produce a clear error in most applications. The connection simply hangs until it times out, and your application may log the email as “sent” even though it never left the server. If you are seeing emails sent but not delivered, a blocked outbound port is one of the first things to verify.
Provider Reputation Affects Inbox Placement Immediately
When you connect your application to an SMTP provider, your sending reputation is tied to that provider’s IP infrastructure from day one. On a shared IP, the sending behavior of other tenants on the same IP influences how Gmail and Outlook receive your email. A previously clean shared IP that suddenly receives spam complaints from another sender will see your delivery rates drop within hours — even if your configuration is perfect.
Misconfiguration Causes Delays, Not Just Failures
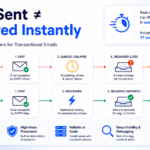
A partially wrong configuration — for example, correct credentials but wrong encryption setting — does not always produce an immediate error. Some SMTP servers will attempt a negotiated fallback that succeeds but introduces latency, or will queue the message and retry on a different encryption path after a delay. These delays may be short enough to go unnoticed in testing but significant enough to affect time-sensitive sends like OTPs and login alerts in production. The full technical breakdown of delivery delays is covered in our guide on why emails are delayed.
Key takeaway: Correct SMTP configuration is the foundation of deliverability — but it is only the foundation. Authentication records, provider reputation, and infrastructure quality determine whether a correctly configured connection produces reliably delivered email.
When Basic SMTP Configuration Is Not Enough
There is a ceiling to what correct SMTP configuration alone can achieve. As your application grows and your sending volume increases, you will encounter problems that no amount of configuration tuning can solve.
Sending Volume Exceeds Provider Limits
Gmail SMTP allows 2,000 sends per day for Google Workspace accounts. Outlook imposes its own limits depending on account type. These limits are designed for personal email use, not for application-level sending. Once you exceed them, your connection is throttled or blocked — and there is no configuration setting that raises the cap.
Shared Infrastructure Creates Unpredictable Delivery
On generic or consumer-grade SMTP infrastructure, you share sending IP addresses with other users. If another sender on the same IP triggers spam complaints or gets blacklisted, your delivery rates drop without any change on your end. You cannot control this through configuration. You need dedicated infrastructure.
No Delivery Visibility at Scale
Basic SMTP setups give you no per-message delivery data. At low volume, this is manageable. As you scale, the inability to see whether a specific email was delivered, bounced, deferred, or filtered becomes an operational liability. When users report missing emails, you have no data to diagnose the problem and no way to detect delivery failures before they generate support tickets.
Reliability Requirements Outgrow Generic Infrastructure
For transactional email — OTPs, payment confirmations, account alerts — delivery reliability is a product requirement, not a preference. A generic SMTP setup has no built-in retry intelligence, no failover routing, no bounce management, and no deliverability monitoring. When the underlying infrastructure has a problem, your email stops. There is no signal and no recovery path.
These are not configuration problems. They are infrastructure problems — and they require an infrastructure solution.
The Role of an SMTP Relay in Solving Configuration at Scale
An SMTP relay service is a dedicated email delivery infrastructure layer that sits between your application and the recipient’s inbox server. It accepts your outbound email over a standard SMTP connection and handles delivery using purpose-built, high-reputation infrastructure — with retry logic, bounce management, delivery logging, and authentication all managed at the relay level.
From your application’s perspective, the configuration is identical: host, port, credentials, encryption. The difference is everything that happens on the other side of that connection.
What a Relay Solves That Configuration Alone Cannot
- Pre-warmed IP infrastructure. Relay services maintain IPs with established sending history and reputation. You benefit from that reputation from your first email, without going through a 30 to 90 day warmup period on a cold IP.
- Delivery logs and event tracking. Every email sent through a relay is logged at the event level — accepted, deferred, bounced, or delivered. When a user reports a missing email, you have an immediate diagnostic trail.
- Authentication support. Relay services guide you through SPF, DKIM, and DMARC setup as part of onboarding. The infrastructure is built to support dual DKIM signing and proper DMARC alignment without requiring you to manage it manually.
- Scalable sending limits. A relay scales with your application. There are no arbitrary daily send caps tied to account type — sending volume is tied to your plan, not to the email provider’s consumer-oriented infrastructure.
- Traffic isolation. A relay designed for transactional email keeps transactional sends on separate IP pools from marketing or bulk traffic, preventing reputation contagion between your different email streams.
In simple terms: Configuring SMTP correctly gets your emails out of the door. Using a relay service makes sure they arrive — reliably, at scale, with visibility into every send.
For a complete guide to evaluating and choosing the right relay service for your use case, see our detailed breakdown on choosing the right SMTP relay for transactional emails.
If you want to understand what your current deliverability looks like before migrating, the complete email deliverability improvement guide walks through every factor and how to measure it.
Platform-Specific SMTP Configuration Notes
WordPress
WordPress uses the wp_mail() function to send email, which by default routes through the local PHP mail() function. This bypasses SMTP entirely and provides no authentication, no delivery logging, and poor inbox placement. To configure proper SMTP in WordPress:
- Install the WP Mail SMTP plugin from the WordPress plugin directory
- Navigate to WP Mail SMTP > Settings in your WordPress admin
- Select “Other SMTP” as your mailer type
- Enter your SMTP host, port, username, password, and encryption type
- Enter your authorized From email address and From name
- Use the Email Test tab to send a test message and verify delivery
This is a configuration change only — no theme or plugin code changes are required.
Node.js with Nodemailer
Nodemailer is the standard library for SMTP sending in Node.js. A basic transport configuration looks like this:
const transporter = nodemailer.createTransport({
  host: 'smtp.yourprovider.com',
  port: 587,
  secure: false,        // false for STARTTLS on port 587
  auth: {
    user: 'your@email.com',
    pass: 'your-smtp-password'
  }
});
Set secure: true when using port 465 with SSL. Set secure: false when using port 587 with STARTTLS — Nodemailer upgrades the connection automatically.
PHP with PHPMailer
PHPMailer is the most widely used SMTP library in PHP. The core configuration block for SMTP sending:
$mail->isSMTP();
$mail->Host       = 'smtp.yourprovider.com';
$mail->SMTPAuth   = true;
$mail->Username   = 'your@email.com';
$mail->Password   = 'your-smtp-password';
$mail->SMTPSecure = PHPMailer::ENCRYPTION_STARTTLS;
$mail->Port       = 587;
Use PHPMailer::ENCRYPTION_SMTPS and port 465 if your provider requires SSL rather than STARTTLS.
Google Workspace
Google Workspace provides SMTP relay service settings that allow outbound application email routing through Google’s infrastructure. The host is smtp-relay.gmail.com, and you authenticate using your Google Workspace account credentials. Note the daily sending limits (2,000 emails per day for standard accounts) and the requirement to configure your sending IP ranges in the Google Workspace admin console before the relay will accept connections.
Microsoft 365
Microsoft 365 supports SMTP authentication with the host smtp.office365.com on port 587 with STARTTLS. Per Microsoft’s SMTP relay documentation, SMTP AUTH must be explicitly enabled for the sending account in the Microsoft 365 admin center — it is disabled by default on many configurations. If your connection succeeds but authentication fails, this is the first thing to verify.
Frequently Asked Questions
What are the basic SMTP configuration settings I need?
Every SMTP setup requires four settings: the SMTP host (the server address your application connects to), the port (587 for STARTTLS or 465 for SSL in most cases), authentication credentials (username and password or API key), and encryption type (STARTTLS or SSL). In addition to these connection settings, you should configure your authorized sender address and set up SPF, DKIM, and DMARC DNS records for your sending domain to ensure inbox delivery.
Which SMTP port should I use — 25, 465, or 587?
Use port 587 with STARTTLS for virtually all application SMTP configurations. Port 25 is blocked by most cloud providers and ISPs for outbound application email and should not be used. Port 465 with SSL is an acceptable alternative if your provider specifically requires it or if port 587 is unavailable in your environment. Never use port 25 for production application email — it provides no default encryption and will fail silently in most modern hosting environments.
Why is my SMTP not working after configuration?
The most common causes are: incorrect port or encryption mismatch (port 587 requires STARTTLS, port 465 requires SSL), wrong or expired credentials, an outbound port blocked by a firewall or hosting provider, or missing SPF and DKIM DNS records causing the email to be filtered after successful delivery. Start by testing the connection with a test email, then check your server logs for specific SMTP response codes. The SMTP not working troubleshooting guide covers each cause with specific diagnostic steps.
Do I need to set up SPF, DKIM, and DMARC for SMTP to work?
SPF, DKIM, and DMARC are not required for an SMTP connection to succeed — but they are required for reliable inbox delivery. Without these DNS authentication records, your emails will pass through the SMTP connection but face spam filtering or rejection by Gmail, Outlook, and Yahoo. As of 2026, all major inbox providers mandate full authentication alignment. Configure these records before going live with any production email sending.
What is the difference between SMTP configuration and an SMTP relay?
SMTP configuration is the set of settings that tells your application how to connect to a mail server. An SMTP relay is the infrastructure service that your application connects to — it receives your outbound email, manages delivery to recipient servers, handles retries and bounces, and provides delivery visibility. Correct SMTP configuration is necessary regardless of which relay you use. A dedicated relay solves the delivery reliability, volume limits, and logging problems that basic SMTP configuration cannot address on its own.
Can I use Gmail’s SMTP server for my application?
Gmail’s SMTP server (smtp.gmail.com, port 587) works for low-volume and development sending. It requires an app-specific password if two-factor authentication is enabled. For production applications, Gmail SMTP is limited to 2,000 sends per day for Google Workspace accounts, provides no per-message delivery logging, and does not support the burst volume that growing applications need. For production use, a dedicated SMTP relay service is the appropriate choice.
How do I know if my SMTP configuration is working correctly?
Run three checks: send a test email through your platform’s built-in test function to verify the basic connection works; send a message to Mail Tester to score your authentication and spam likelihood; and use MXToolbox to verify SPF, DKIM, and DMARC records are correctly published in DNS. All three together give you a complete picture of whether your configuration will produce reliable inbox delivery in production.
Conclusion: Correct Configuration Is the Starting Point, Not the Finish Line
SMTP configuration is not complicated — but it requires precision. Every setting matters, the values must match exactly what your provider specifies, and the combination of port, encryption, and authentication must be internally consistent. Get these details right and your application will connect to your mail server reliably.
That is the starting point. Reliable delivery — especially for transactional email that users depend on in real time — requires more than a correct connection. It requires proper DNS authentication records, a provider with clean IP reputation, delivery logging that gives you visibility into every send, and infrastructure that can handle your actual sending volume without rate limiting or throttling.
For most applications beyond the early development stage, a dedicated SMTP relay service is the practical path to all of these. It accepts the same SMTP connection your application is already configured for — and delivers everything that basic SMTP infrastructure cannot: reliability, visibility, authentication support, and scale.
If you are still seeing errors after configuration, the SMTP not working troubleshooting guide covers every common failure mode with specific diagnostic steps. If you are ready to move past configuration and evaluate relay options, the PhotonConsole pay-as-you-use pricing lets you start at the right scale and grow without cost penalties.
Correct configuration builds the connection. The right infrastructure delivers the email. Both matter — and neither works well without the other.
Read More
- SMTP Not Working: Causes and Fixes
- SMTP Testing Methods: How to Verify Your Email Setup
- SMTP Response Codes Explained
- SPF, DKIM and DMARC Explained Simply
- How to Improve Email Deliverability
- Emails Sent But Not Delivered: Causes and Fixes
- Why Are My Emails Delayed: Causes, Diagnosis and Fixes
- SMTP Relay for Transactional Emails: How to Choose the Right One